In a world where instant gratification often takes center stage, there is something remarkably satisfying about the slow and deliberate process of transforming fresh fruits into delectable preserves. It is an art as old as time itself, a tradition passed down through generations, and a testament to our yearning for connection with nature's abundance.
Preserving the essence of seasonal fruits is akin to capturing a fleeting moment of perfection, bottling up the sweetness, tartness, and vibrancy to be savored during the colder months. Each jar of homemade preserves tells a unique story; a whispered secret shared only with those who take the time to peel, chop, and simmer.
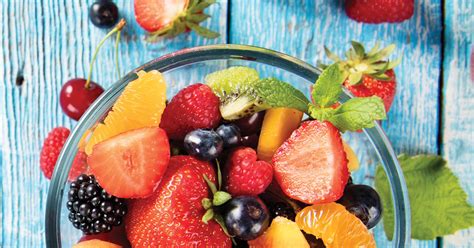
Delve into the world of fruit preservation, and you will discover a kaleidoscope of flavors that elevate the simplest of dishes. From the tangy brightness of citrus marmalades to the velvety richness of berry compotes, these jewel-toned creations offer a glimpse into the vast array of tastes and textures that nature has to offer. With a dash of creativity and a touch of patience, you can transform humble ingredients into culinary masterpieces that transcend the ordinary.
Choosing the Perfect Fruit

In this section, we will explore the crucial step of selecting the ideal fruit for creating delicious homemade jams. The fruit you choose is the foundation of your jam, and it plays a vital role in determining the flavor, texture, and overall quality of the final product. It is important to carefully consider various factors such as the ripeness, sweetness, and acidity levels of different fruits to achieve the perfect balance in your jam.
When selecting fruit for jam-making, opt for fruits that are ripe yet firm, as they will provide the best flavor and texture. Overripe fruit may result in a mushy jam, while underripe fruit may not release enough natural pectin, leading to a runny consistency. Similarly, consider the sweetness level of the fruit, as it will determine the amount of sugar needed to balance the flavors. Sweeter fruits may require less sugar, while tart fruits will need a bit more to achieve the desired taste.
Another crucial aspect to consider is the acidity level of the fruit. Acidic fruits like lemons, oranges, or raspberries help to preserve the color and freshness of the jam, as well as provide a tangy contrast to the sweetness. On the other hand, low-acid fruits such as peaches or apricots may require the addition of lemon juice or other acidic ingredients to ensure proper preservation and flavor development.
- Look for fruits that are in season for optimal flavor and freshness.
- Consider the texture of the fruit and how it will translate into the final jam.
- Experiment with different combinations of fruits to create unique flavor profiles.
- Take note of any allergies or dietary restrictions when choosing fruits for your jams.
- Consider the availability and cost of the fruit, especially if you are planning to make large batches of jam.
By selecting the perfect fruit and understanding its characteristics, you will be able to create homemade jams that are bursting with flavor and bring joy to every bite. Now that you have a clear understanding of how to choose the ideal fruit, let's move on to the next step in the jam-making process.
Gathering the Essential Tools
When embarking on your culinary adventure of creating delicious preserves, having the right equipment is crucial. This section will guide you through the process of gathering all the necessary tools to ensure a successful homemade jam-making experience.
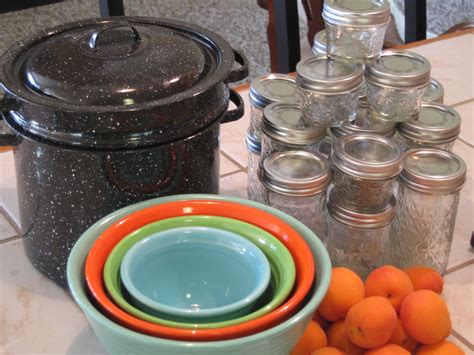
- Large Pot: A spacious pot is essential for accommodating the mixture of fruit, sugar, and other ingredients. Ensure that the pot is made of a heat-resistant material such as stainless steel or enamel.
- Canning Jars: The perfect vessel for storing your homemade jam, canning jars come in various sizes and shapes. Opt for jars with proper sealing lids and consider the quantity of jam you intend to make.
- Funnel: This handy tool allows you to transfer the jam mixture into the jars without any spills or mess. Look for a funnel that fits the mouth of your canning jars to ensure a perfect fit.
- Ladle: Used for scooping the hot jam mixture into the jars, a ladle with a long handle provides convenience and safety during the canning process.
- Heatproof Spatula: A heatproof spatula is ideal for stirring the jam mixture to prevent it from sticking to the pot or burning. Choose a spatula with a sturdy handle and a heat-resistant head.
- Candy Thermometer: To achieve the perfect consistency and texture of your jam, a candy thermometer is essential for accurately measuring the temperature during the cooking process.
- Jar Lifter: Safely remove the hot canning jars from boiling water with a jar lifter. This tool helps prevent burns and ensures a secure grip on the jars.
- Magnetic Lid Lifter: A magnetic lid lifter simplifies the process of retrieving sterilized lids from hot water. The magnetic end allows you to easily pick up the lids without touching them directly.
- Labels and Markers: Keep your homemade jam organized by labeling each jar with its contents and the date of creation. Use markers that are waterproof and resistant to smudging.
By gathering these essential tools, you will be well-prepared to embark on your homemade jam-making journey. Now that you have the right equipment in hand, let's move on to the next step of selecting the freshest ingredients for your delectable jams.
Preparing the Fruit

In this section, we will explore the essential steps to prepare the fruit for your delicious homemade jam. Properly preparing the fruit is crucial to ensure the ultimate taste and texture of your jam, and taking the time to carefully follow these steps will result in a truly satisfying outcome.
Selecting the Fruit:
- Choose ripe and flavorful fruit that is at its peak freshness. This will guarantee a more intense and enjoyable taste in your jam.
- Inspect the fruit for any signs of damage or spoilage, discarding any that are in poor condition.
- Consider combining different types of fruit to create unique flavor combinations.
Washing the Fruit:
- Gently rinse the fruit under cold water to remove any dirt or pesticide residue.
- Pat dry the fruit using a clean towel or paper towel.
Peeling and Pitting:
- If necessary, peel the fruit using a sharp knife or a peeler, ensuring that only the skin is removed and minimal flesh is lost.
- For fruits with pits or seeds, carefully remove them using a small knife or a spoon.
Slicing or Dicing:
- Depending on the desired consistency of your jam, slice or dice the fruit into small, uniform pieces.
- Take into account the cooking time and how the fruit will break down during the process.
Macerating the Fruit:
- In some recipes, it is beneficial to macerate the fruit by sprinkling sugar over it and allowing it to sit for a period of time.
- This process helps to draw out the natural juices from the fruit and enhance its flavor.
By following these essential steps to prepare the fruit, you are laying the foundation for a delicious homemade jam that will leave your taste buds wanting more. Taking the time to carefully select, wash, peel, pit, slice/dice, and macerate the fruit will undoubtedly contribute to the success of your jam-making adventure. Now that you have completed this crucial step, you are ready to move on to the next exciting phase of the process.
Addition of Sweeteners
In this section, we will explore the various options available for sweetening your homemade jams without using traditional sugar. While sugar is often used as a standard sweetener, there are alternative options that can add unique flavors and cater to different dietary needs.
1. Natural Sweeteners:
- Honey: Known for its natural sweetness and rich aroma, honey adds a distinct flavor to jams. Use raw honey to retain its nutritional benefits.
- Maple Syrup: With its smooth and almost buttery taste, maple syrup can be a great alternative sweetener. Make sure to use pure maple syrup for the best results.
- Agave Nectar: Derived from the agave plant, this sweetener has a mild taste and a lower glycemic index than sugar, making it suitable for those with diabetes.
2. Fruit-based Sweeteners:
- Applesauce: Made from cooked and pureed apples, applesauce adds natural sweetness and moisture to the jam. It is an excellent option for reducing sugar content.
- Dates: Rich in fiber and natural sugars, dates can be pureed and added to the jam for a caramel-like sweetness. They also contribute to a gooey texture.
- Fruit Juice Concentrate: By reducing the juice of fruits like apple or grape, you can create a concentrated sweetener that enhances the fruity flavors in the jam.
3. Artificial Sweeteners:
- Stevia: This non-nutritive sweetener is derived from the stevia plant and provides sweetness without adding calories. It is a suitable choice for those following a low-calorie or low-carb diet.
- Monk Fruit Sweetener: Made from a small, green fruit called monk fruit, this sweetener offers a natural sweetness with zero calories and a lower glycemic index than sugar.
- Erythritol: A sugar alcohol with minimal calories and a low glycemic index, erythritol provides sweetness without causing a significant impact on blood sugar levels.
When substituting sugar with alternative sweeteners, it's important to consider the different tastes and sweetness levels they provide. Experiment with different combinations and proportions to find the perfect balance for your homemade jams!
Essential Ingredients and Flavor Enhancers

In this section, we will explore the key components and additions that elevate the taste and texture of your homemade jam. From the foundational ingredients that give your jam its base flavor to the secret flavor enhancers that add a delightful twist, understanding these elements will enable you to create delectable and unique homemade jams.
| Ingredients | Flavor Enhancers |
|---|---|
| Fruit: the centerpiece of any jam, the choice of fruit determines the primary flavor profile. | Zest: adding citrus zest to your jam provides a burst of brightness and complexity. |
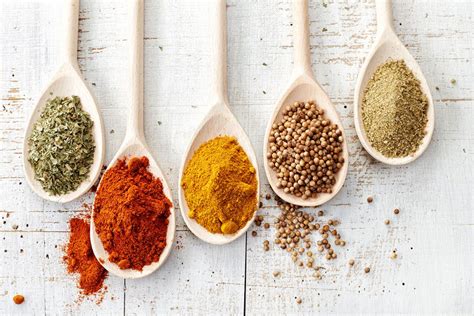
| Sugar: acts as a natural preservative and sweetener, bringing balance to the tartness of the fruit. | Spices: a dash of cinnamon, nutmeg, or cloves can enhance the warmth and depth of your jam. |
| Pectin: a natural thickening agent derived from fruits, it helps create the desired consistency. | Liqueur: a splash of your favorite liqueur can infuse your jam with a touch of elegance and sophistication. |
| Lemon Juice: a tablespoon of lemon juice brightens the flavors and helps set the jam. | Herbs: fresh herbs like mint, basil, or thyme can add an unexpected and refreshing twist to your jam. |
| Water: a necessary component to create a fluid base and aid in the cooking process. | Vanilla Extract: a few drops of vanilla extract can impart a subtle richness to your jam. |
Experimenting with different combinations of fruits, sugar ratios, and flavor enhancers is a delightful aspect of creating your own homemade jams. Understanding the role of essential ingredients and knowing how to enhance their flavors will help you achieve the perfect balance and create jams that are irresistibly delicious.
Cooking and Thickening the Jam Mixture
In this section, we will explore the process of transforming the fruity concoction into a delectable, spreadable delight. Discover the art of simmering and thickening the mixture to achieve the perfect texture and consistency for your homemade jam.
Once you have prepared the fruity base, it's time to bring it to life through the gentle application of heat. Place the mixture in a saucepan and set it over low to medium heat. The slow and steady cooking process allows the flavors to meld together harmoniously.
As the mixture gently simmers, it's important to stir it occasionally to prevent it from sticking to the bottom of the pan. This also helps distribute the heat evenly, ensuring a consistent texture throughout.
During the cooking process, the natural pectin, a substance found in many fruits, will be released. However, to further enhance the thickening of the jam, a suitable thickening agent, such as gelatin or cornstarch, can be added. This step is crucial for achieving a jam that spreads effortlessly and holds its shape.
When incorporating a thickening agent, it's important to follow the instructions provided and slowly introduce it to the simmering mixture. This prevents any clumping or uneven distribution of the thickener. Keep in mind that a little goes a long way, so add it gradually until the desired consistency is reached.
As the jam continues to simmer, it will gradually thicken, transforming into a luscious and gooey texture. To test if the jam has reached the desired consistency, a spoonful can be placed on a chilled plate. If it holds its shape and doesn't run, then it's ready to be jarred and enjoyed.
Remember, the cooking and thickening process is an essential part of crafting the perfect homemade jam. Paying attention to the heat, stirring regularly, and adding the right amount of thickening agent will result in a final product that is not only bursting with flavor but also boasts a smooth and spreadable texture.
Jar Preparation and Sterilization

Ensuring the cleanliness and sterility of the jars is a crucial step in the process of creating delectable homemade jam. Properly preparing and sterilizing the jars will help to maintain the quality and freshness of the jam, allowing you to enjoy your flavorful creations for longer periods.
Before starting your jam-making adventure, gather the necessary supplies such as glass jars with lids, a large pot or canner, a jar lifter or tongs, and a kitchen towel. It is important to select jars specifically designed for canning, ensuring they are free from cracks, chips, or any other imperfections that may compromise the integrity of the final product.
The first step in preparing the jars is to wash them thoroughly in hot, soapy water. Pay close attention to cleaning the rims of the jars, as they will come into direct contact with the sealing compound. Rinse the jars well, allowing them to air dry or drying them with a clean kitchen towel.
Once the jars are clean and dry, it is time to sterilize them. This process involves subjecting the jars to high temperatures to eliminate any potential bacteria or microorganisms that may interfere with the preservation of the jam. There are several methods for sterilizing jars, including boiling, oven, or dishwasher methods.
- Boiling method: Place the jars in a large pot or canner, making sure they are completely submerged in water. Bring the water to a rolling boil and let the jars boil for 10-15 minutes. Remove the jars from the pot using jar lifters or tongs, allowing them to cool on a clean kitchen towel.
- Oven method: Preheat the oven to a temperature of 225°F (107°C). Place the jars on a baking sheet and carefully transfer them into the preheated oven. Let the jars bake for 15-20 minutes. Once sterilized, remove the jars from the oven using oven mitts, and set them aside to cool.
- Dishwasher method: Load the jars into the dishwasher, ensuring they are not touching each other. Run a hot water cycle with a heated drying option. Once the dishwasher cycle is complete, remove the jars and lids and allow them to cool.
Regardless of the sterilization method you choose, it is essential to handle the jars with clean hands or utensils to avoid introducing any contaminants. Remember to only sterilize the jars right before using them; otherwise, they may become recontaminated.
With properly prepared and sterilized jars, you are now ready to proceed with the delightful task of filling them with your homemade jam, sealing in the delicious flavors and aromas that will bring joy to your breakfast table or make delightful gifts for friends and family.
Filling and Sealing the Jars
Once you have prepared your delectable concoction, it's time to move on to filling and sealing the jars. This essential step ensures that your homemade jam is perfectly preserved and ready to be enjoyed at any time. In this section, we will explore the techniques and tips for filling the jars with your jam and sealing them securely. Let's dive in!
Before filling the jars, it is important to ensure that they are clean and sterilized. This will help prevent any unwanted bacteria or contamination that could spoil your jam. Start by washing the jars with warm soapy water and rinsing them thoroughly. Then, sterilize them by either boiling them in a pot of water for a few minutes or placing them in a hot oven. Ensure that all lids and seals are also cleaned and sanitized.
Once your jars are prepared, it's time to carefully transfer the jam into them. Make sure to leave about 1/4 inch of headspace at the top of each jar to allow for expansion during the sealing process. You can either use a ladle or a funnel to pour the jam into the jars, being careful not to spill or drip any on the rims. Wipe off any excess jam on the rims with a clean, damp cloth to ensure a proper seal.
Now it's time to seal the jars. Place a lid on top of each jar and screw on the bands until they are finger-tight. Remember not to overtighten them, as it could prevent the jars from sealing properly. Once the lids are secured, you have two options for sealing: water bath canning or refrigerator storage.
If you choose water bath canning, carefully lower the jars into a large pot of boiling water, making sure they are completely submerged. Allow them to boil for the specific time indicated in your recipe, usually around 10-15 minutes. After boiling, carefully remove the jars from the water and place them on a towel to cool. As they cool, you may hear a satisfying "pop" sound, indicating that the jars have sealed successfully.
For refrigerator storage, simply allow the jars to cool at room temperature for a couple of hours before transferring them to the refrigerator. This method is best for small batches of jam that will be consumed within a few weeks, as the seals may not be as airtight as with water bath canning.
Once the jars have completely cooled, it's a good idea to label them with the date and type of jam. This will help you keep track of their freshness and ensure you reach for the oldest jars first. Properly sealed and stored, your homemade jam can last for up to a year. Enjoy the fruits of your labor on toast, scones, or as a sweet addition to your favorite recipes!
| 1. | Use a funnel or ladle to fill the jars, leaving a 1/4 inch headspace. |
| 2. | Wipe off any excess jam on the rims before placing the lids. |
| 3. | Secure the lids finger-tight, avoiding overtightening. |
| 4. | Choose between water bath canning or refrigerator storage for sealing the jars. |
| 5. | Label the jars with the date and type of jam for easy identification. |
Storage and Enjoyment

Once you have successfully made your delicious fruit preserves, it's important to know how to properly store and enjoy them. This section will provide you with valuable tips and suggestions on how to keep your homemade jams fresh and flavorful, as well as creative ideas on different ways to enjoy them.
- Store in a Cool Place: To maintain the quality and taste of your jams, it is best to store them in a cool and dark place, such as a pantry or cupboard. Avoid exposing them to direct sunlight or high temperatures, as this can cause the flavors to deteriorate.
- Airtight Containers: Transfer your jams into clean, airtight containers to ensure maximum freshness. Mason jars with screw-top lids or glass jars with rubber seals are excellent choices for storing homemade jams.
- Label and Date: Don't forget to label your containers with the type of jam and the date it was made. This will help you keep track of the expiration dates and avoid confusion when reaching for a specific flavor.
- Refrigeration Option: While it is not necessary to refrigerate homemade jams if they are properly stored, refrigeration can help extend their shelf life. If you prefer a chilled jam, store a jar in the refrigerator a few hours before serving.
- Freezing: One great way to preserve larger batches of homemade jams is by freezing them. Simply transfer the jam into freezer-safe containers or resealable bags, leaving some headspace for expansion, and store in the freezer for up to a year.
Now that you know how to store your jams, let's explore the delightful ways to enjoy them:
- Spread on Toast: The classic way to enjoy jam is by spreading it on freshly toasted bread or bagels. The sweet and fruity flavors pair perfectly with the crispness of the toast.
- Top Pancakes or Waffles: Elevate your breakfast or brunch by drizzling your favorite jam on top of fluffy pancakes or golden waffles. It adds a burst of sweetness and complements the buttery goodness.
- Mix into Yogurt: Transform plain yogurt into a flavorful treat by mixing in a spoonful or two of your preferred jam. This simple addition adds a delicious twist and enhances the creaminess of the yogurt.
- Fill Pastries and Donuts: Get creative in the kitchen by using your homemade jam as a filling for pastries, such as turnovers, tarts, or donuts. The fruity center will surprise and delight your taste buds.
- Serve with Cheese: Create a savory-sweet combination by pairing your jam with cheese. Soft cheeses like brie or cream cheese are particularly tasty when spread on crackers and topped with a dollop of jam.
With these storage tips and enjoyment ideas, you can make the most of your homemade jams and savor their delectable flavors in a variety of ways. Get ready to indulge in a world of sweet and tangy delights!
FAQ
What are the basic ingredients needed for homemade jam?
The basic ingredients needed for homemade jam are fresh fruit, sugar, lemon juice, and pectin.
Can I use frozen fruit instead of fresh fruit?
Yes, you can use frozen fruit instead of fresh fruit for homemade jam. Just make sure to thaw it before using.
How much sugar should I add to the jam?
The amount of sugar needed for homemade jam varies depending on the sweetness of the fruit. A general rule of thumb is to use an equal amount of sugar to fruit, but you can adjust it according to your taste.
Do I need to sterilize the jars before filling them with jam?
Yes, it is important to sterilize the jars before filling them with jam to prevent the growth of bacteria and ensure that the jam stays fresh. You can sterilize them by boiling the jars and lids or using the dishwasher.


